


The Wood Floor Installation Process Explained
Wooden floors are a sign of luxury and style to any home. Once installed, they are valuable assets and bring warmth and comfort for many years. Floor fitting is quite complicated thing to do and requires careful preparation and planning to ensure best results. More importantly, the wood floor installation process is best left to skilful and experienced fitters as any mistakes can cost you a lot of money. There are some important steps that any floor fitting process must follow.
Acclimatisation
An important part of any floor fitting project is the acclimatisation – allowing the wooden flooring to remain in the area where it will be fitted to adjust to the internal environmental conditions. As a natural product, wood tends to react to changes in environmental conditions, such as temperature and humidity by expanding and contracting. Therefore, letting the flooring stay in the new environment is very important so that it can adjust accordingly. Solid wood floors require longer acclimatisation period – approximately 7 days, while engineered floors need about 72 hours prior to the fitting. If acclimatisation period is not allowed, there is a huge risk that once installed, the wood will react to the humidity and temperature and will expand or contract, causing significant problems. There is no need to take the flooring out of the original packaging, all you need to do is carefully place the packs in a dry and well ventilated area, ensuring that there is no source of moisture which can damage the flooring.
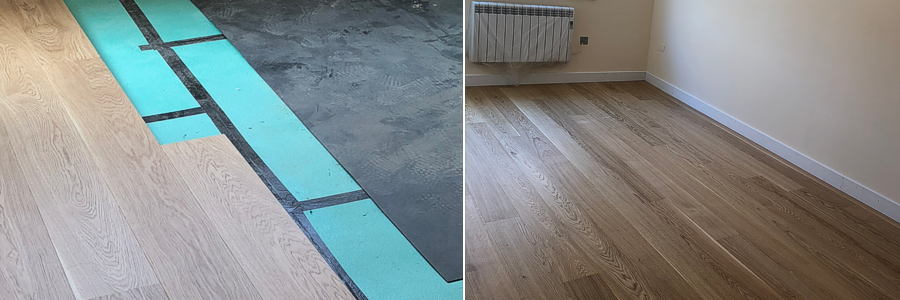
Subfloor Preparation.
Once the flooring has been acclimatised, the subfloor preparation is a crucial part of the hardwood fitting process. Subfloors can be either concrete or wooden, and depending on the particular type there are different steps that need to be taken to ensure a flat, clean and dry surface for the new floors. Subfloor levelling of wooden floors often involves refitting of any loose planks and also installation of plywood on top to ensure smoot and even surface. Concrete subfloors are usually levelled with the use of Self Levelling Compound (SLC).
Nail Down Installation
This is one of the most popular hardwood fitting method, especially where the subfloor is made of wood or plywood. Floorboards are nailed down with the use of specific tools, called nail guns to secure them to the subfloor. This provides a high level of security and stability. This method allows for local repairs to be done if needed, where individual boards can easily be removed and replaced.
Glue Down Installation
With this floor fitting method, floorboards or parquet blocks are attached to the subfloor with the use of strong wood floor adhesives, creating a very stable bond. Glue down is only applicable for concrete subfloors and is the only possible solid parquet floor installation method.
Floating Installation
Most engineered wood and laminate floorings can be installed as “floating” with the use of different types of click installation systems. Floating means that the individual floorboards are not attached to the subfloor with nails or glue, but they are rather connected one to the other with a very stable locking profile, allowing no movement between the boards. Alternatively to the click system, the tongue and groove floors can also be fitted as floating, where the tongue of one board fits inside the groove of the other creating a stable connection. Floating floor installation allows the fitting of underlays between the subfloor and the wooden floors, creating a better sound and moisture insulation.
Junckers Flooring Installation
Junckers floor fitting is a unique solid wood installation system using metal clips to hold the boards together. This is the only fitting system allowing floating installation of solid wood floors.